By Joris Dormans (June, 2019)
This is a blog about our development of Unexplored 2: The Wayfarer's Legacy. This game features state-of-the-art content generation, generative storytelling, emergent gameplay, adaptive music, and a vibrant art style.
We take great pride in the level generator in Unexplored 2. It really is a state-of-the-art piece of software. In this post I'll let shed some light on how levels in Unexplored come about.
We didn't need to reinvent the wheel. For Unexplored 1 we already pioneered techniques that contributed greatly to the critical acclaim of the first game. For Unexplored 2 we simply picked up where we were left. The core of our technology is two-fold: we use a multi-stage process that almost emulates a process that is quite similar to how a human level designer could approach it. On top of that, we use something we call 'cyclic dungeon generation' which is much better at generating levels with a natural feeling flow that more typical applications of generative content generation. In this post I'm going to focus on the first aspect. How we adapted cyclic dungeon generation for Unexplored 2 will be the subject of a future post.
The level generator breaks down the process of generating a level into a whole bunch of manageable steps. Working its way down from a high-level plan to a low-level detailed map of the level. It basically sketches the level and starts adding detail until the level is complete and populated.
For each individual step in the process we use generative grammars to transform the level we have generated thus far. In particular we use tile grammars and graph grammars which are variants of the more common string based grammars which simply search for and replace bits of strings with other strings, much like you do with regular expressions. If generative grammars and regular expressions are unfamiliar to you I recommend you search for a few examples online (or simply read on, you do not need detailed knowledge of either to understand the main gist of this post).
The first step of a level is relatively simple. We use a low resolution bitmap to lay out the very basics of a level. In the example below the level starts out real simple: it simply consists of an entrance (e) on the left, and entrance on the right and a straight path connecting the two. Most other tiles are left undefined (u) or are blocked (B) because they are at the edge of the level.
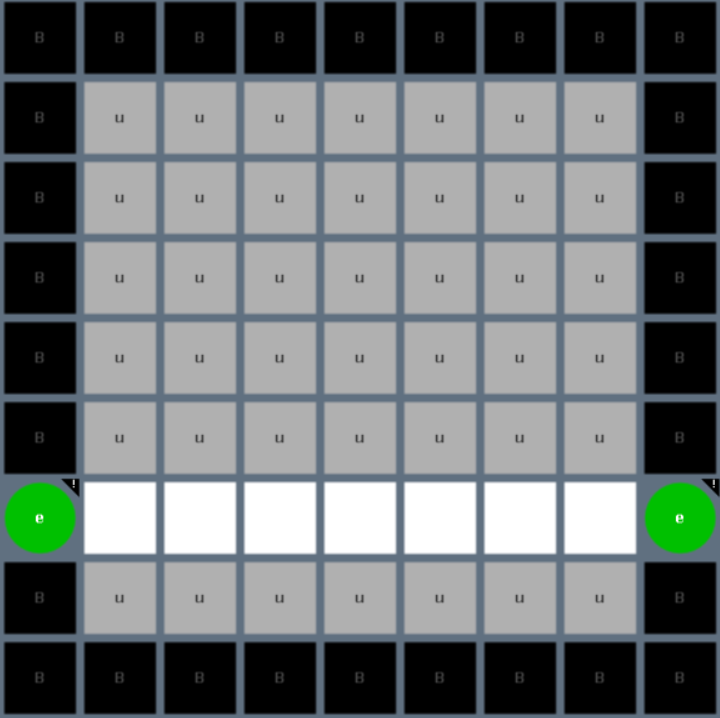
Figure 1: The simple start of a level
The next step adds detail: a bunch of rooms are added connected by gates that are designed to be traversed in a particular direction:
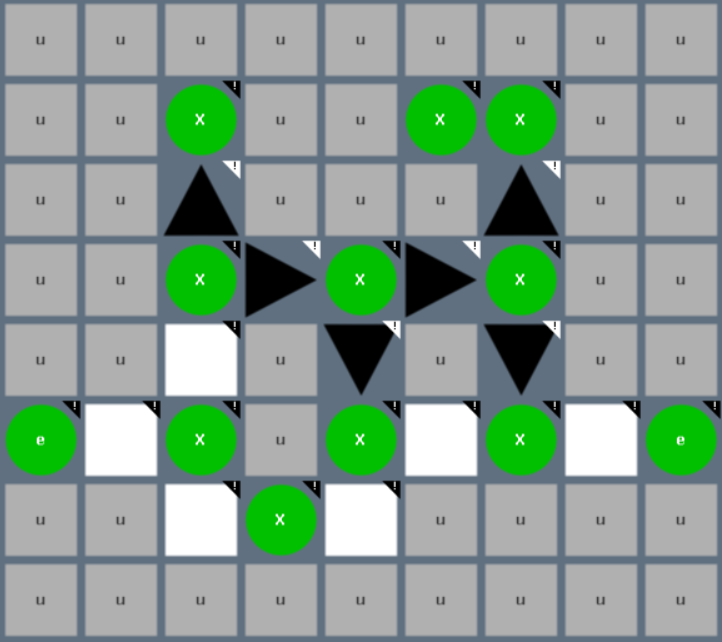
Figure 2: Added structure
Now tile maps are great for when you are creating a level geometry, but to generate gameplay structures and logic it is more practical to work with graphs. This is exactly what the generator does next:
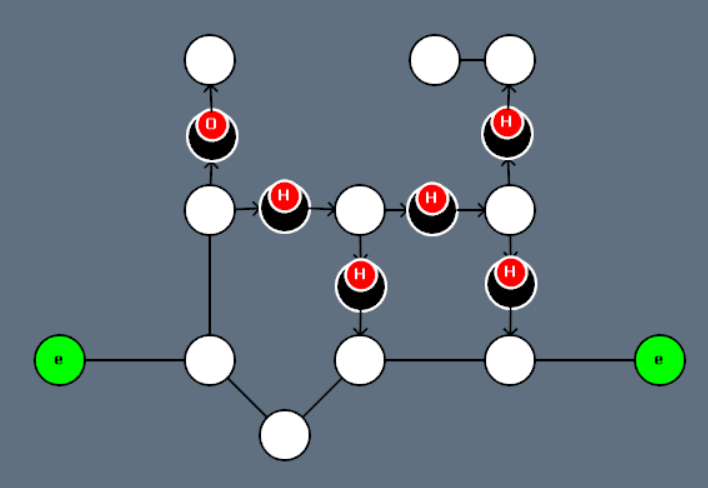
Figure 3: The basic graph
In the graph some nodes contain subnodes, in this case most of the gates are marked as hazardous (H) while one is marked as open (O).
Based on fairly simple analysis and generative rules features are added to the graph. For example the goal (G) is placed in a location that is relatively far away from the entrances and minor hazards are added to the graph to make the level more dangerous.
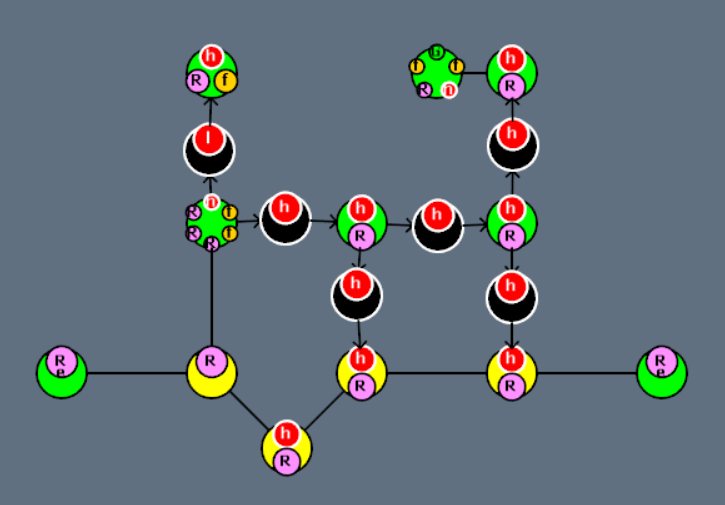
Figure 4: More features added to the graph.
In the meantime the low resolution tile map is converted into a high level tile map, using a few noise functions to give the new tile map a more natural appearance:
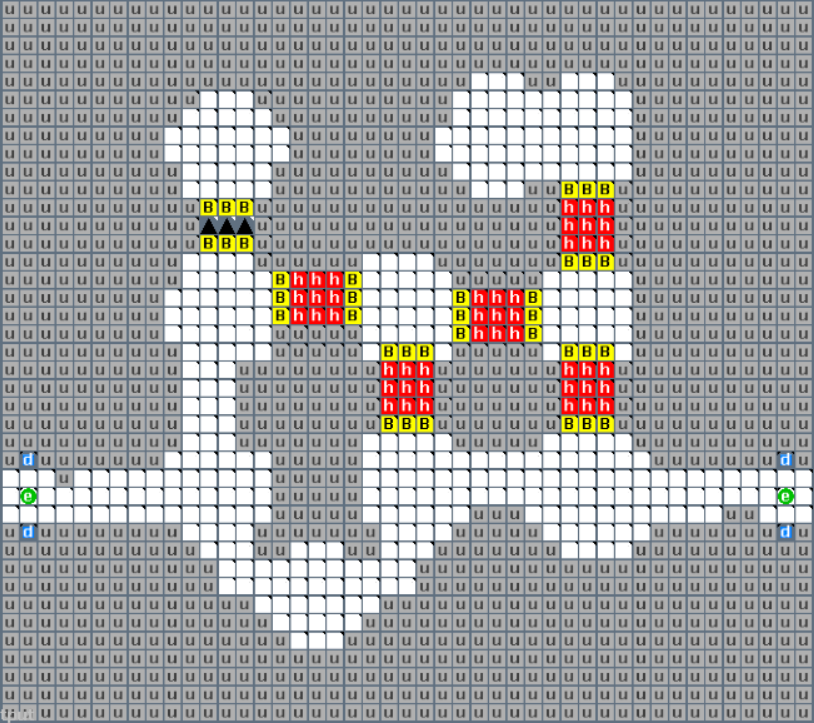
Figure 5: High resolution tile map
Next the info in the graph is used to decorate the time map and add extra features:
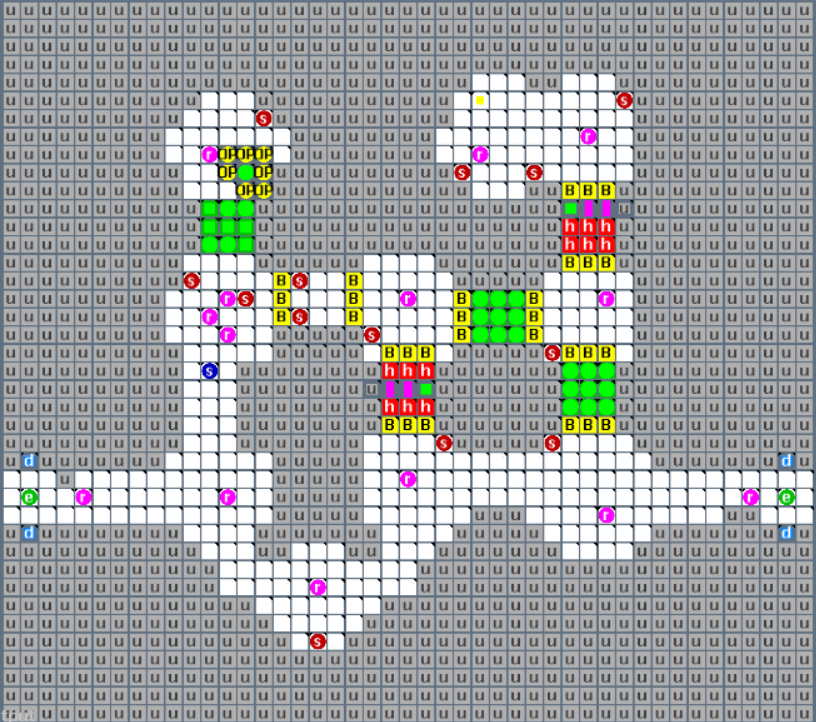
Figure 6: Decorated tile map.
The map as it is generated is purely a gameplay representation. White tile indicate open spaces, and other while the other tiles mostly all indicate very specific gameplay features such as secret passage through bushes (green circles), 'thicket gates' (green squares and magenta bars), or spawning locations for snap trees (red circles marked with an s). Much of the level is still undefined and at this stage the level generator assumes these areas must be filled in in a way that blocks the players movement.
It does so in a few layers: The bottom layer indicates elevation and ground type, the second adds in water at certain locations, and the third layer puts in vegetation and other decorations.
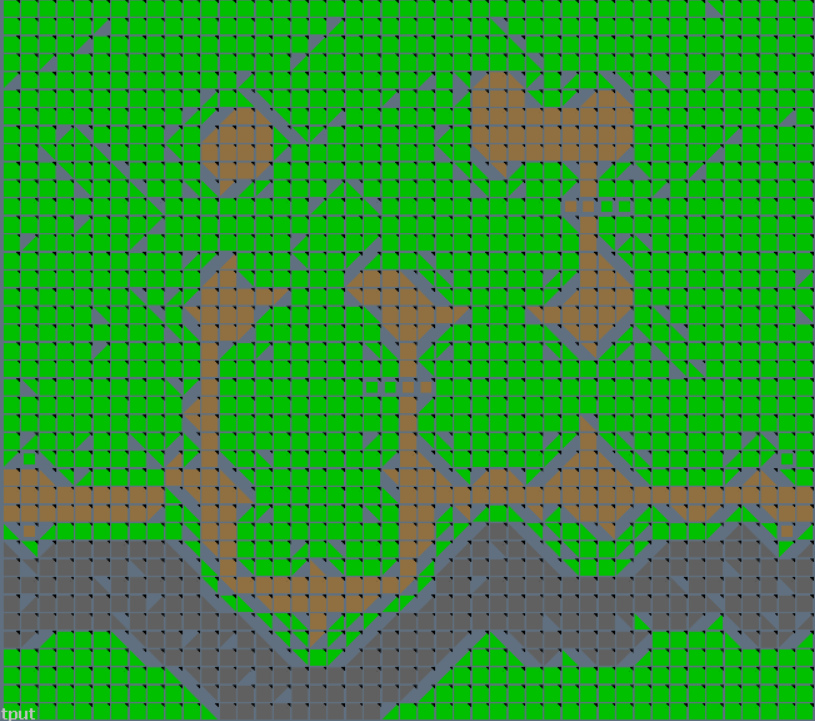
Figure 7: Ground types (grass, dirt, and rock)
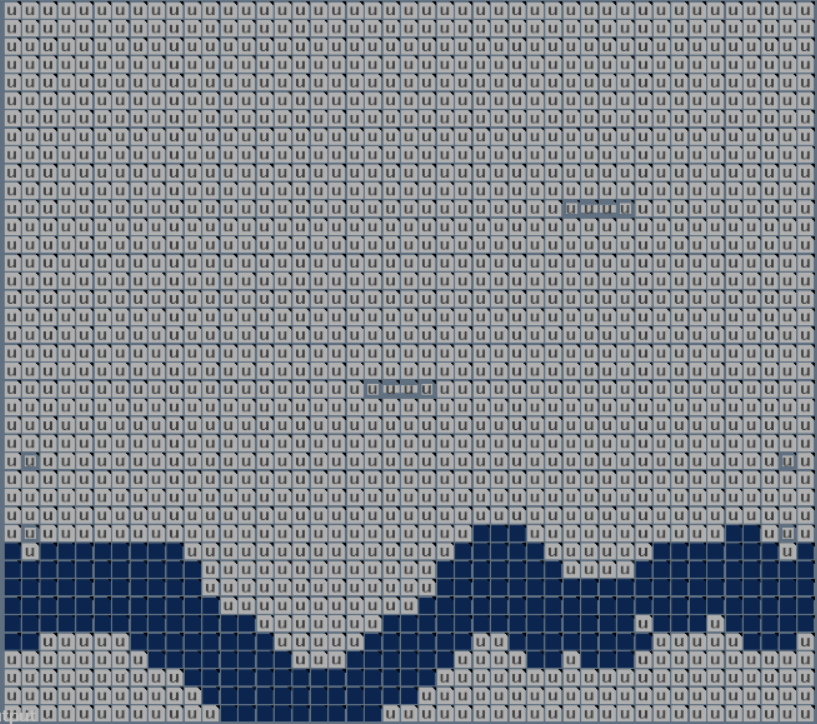
Figure 8: Water
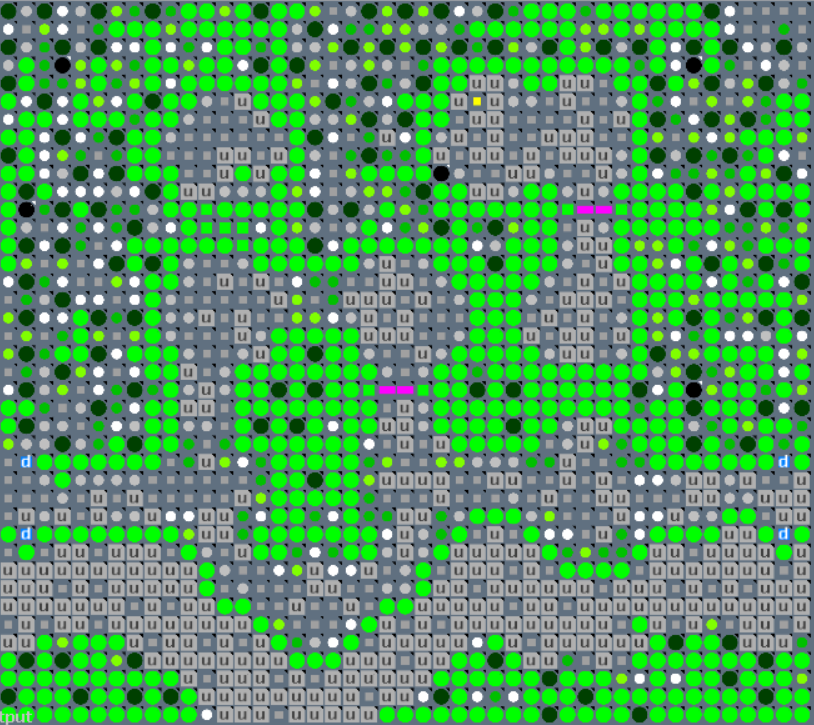
Figure 9: Vegetation and other decorations
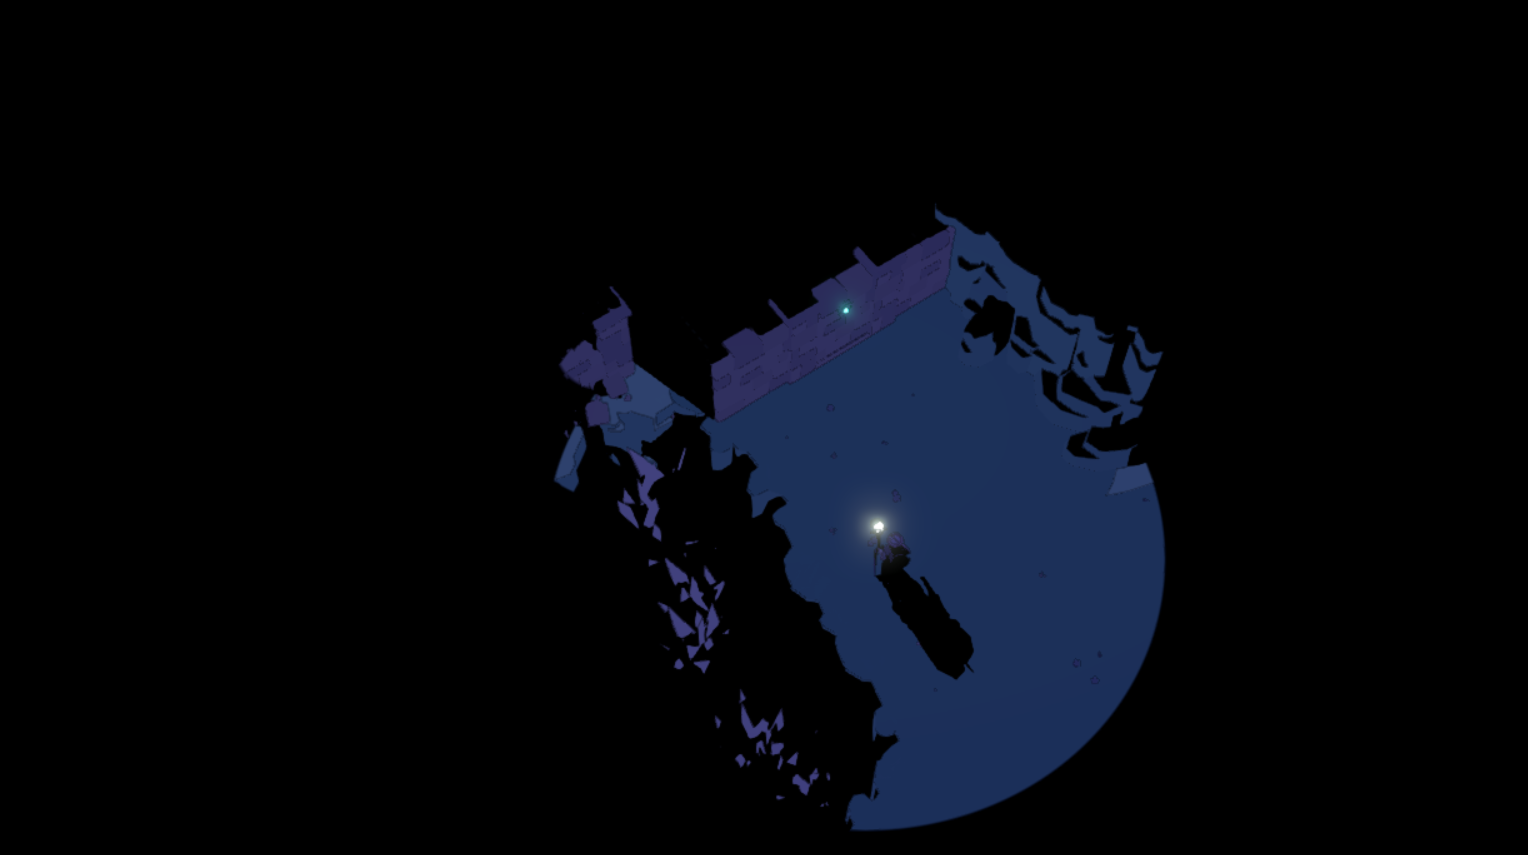
These layers are then stacked into a final level data file, where a few more details are added. It is this data that game uses to place assets and build the level as you see them in the game. There's a whole lot of trickery in that step. For example you might have noticed that the ground tiles in the figure above have odd shapes. These shapes are used to create the ground 'tiles' in such a way you hardly notice that the original data was a tilemap. I'll write about that in the future, too.
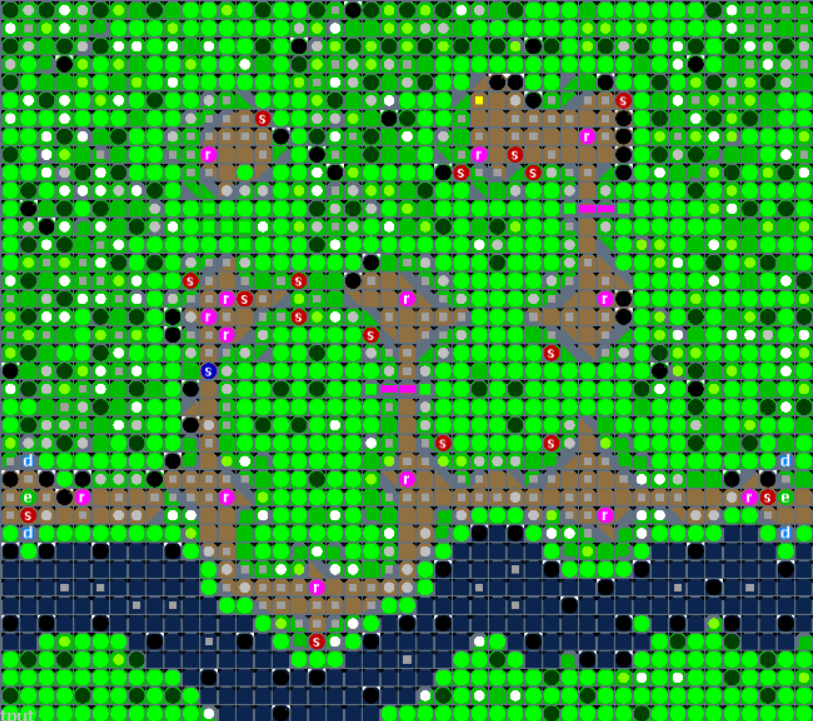
Figure 10: The final level
There is a lot of advantages to generating levels in this way. Especially the step to translate the level into a graph in order to make it easier for the generator to 'reason' about the gameplay is important. In the example above it didn't do anything more interesting with it than to make sure level goals are spawned some distance from the entrances. But in other levels there is more going on in those steps.
Take this example of a more classic dungeon style cave map (as opposed to the forest location in the example above). The basic graph of that cave level has only one entrance and a couple more types of gates. A couple of them are locked (L), one traps the player on one side (T) and the dark green one is what we call a 'valve': a sort of gate that only allows the player to traverse in one direction.
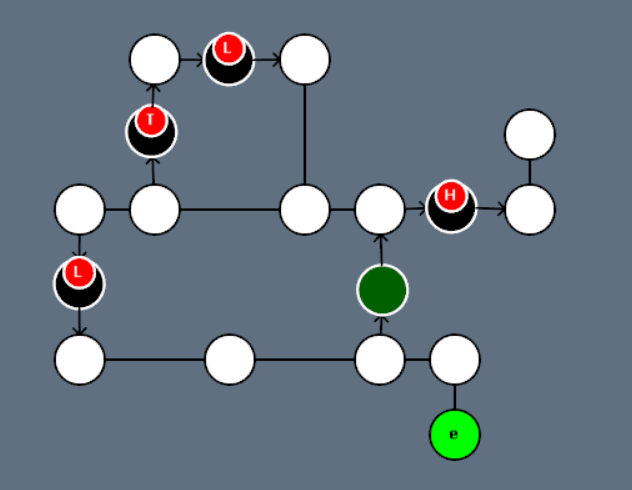
Figure 11: The base graph of a cave
The structure of this level allows the generator to create a far more complex mission. For example, the only way into this level is to follow the valve after which the player is forced to find another way out. The key to unlock the way out (on the bottom left) is placed behind the hazard at the top left, while the goal is placed after the gate that will trap the player. An example of such a gate would be a passage that collapses behind the player. As a whole this creates a cave that is already quite exciting to explore in its own, but Unexplored 2 also has the option to add creatures and encounters to the mix at run-time.
Figure 12: Locks and keys added to cave
Using the same process as above the graph is used to generate and populate a fully detailed tilemap. Using different parameters reflecting the cave-like nature of this level yields vastly different results, with ruined underground structures (marine squares marked c) and vast spike-filled chasms (the magenta circles):
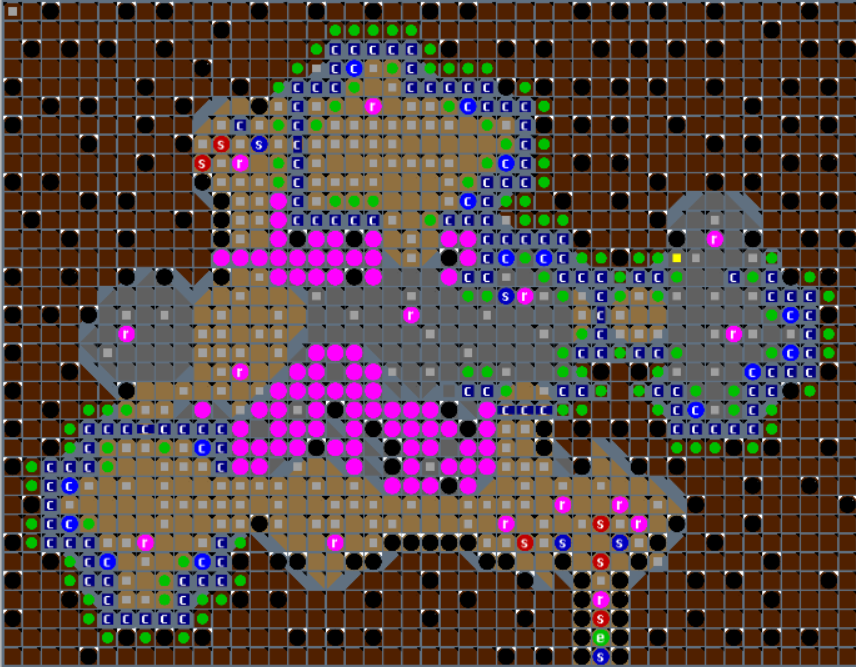
Figure 13: The cave level in full detail
Well that's it for now. I hope you got a glimpse of how we approach level-generation in Unexplored 2. It is a complex multistage process about which I plan to write more in the near future. At least I already promised to write something on the application of cyclic dungeon generation in Unexplored 2, and how we translate the tilemaps into actual level geometry. But there is so much more we can talk about. From generative storytelling techniques, via line-renderers and shading techniques, to the lengthy design process we had creating the fortune system, among other things.
If you are interested in learning more about the game please check us out on Epic Game Store.
Contact: info@ludomotion.com