By Joris Dormans (June, 2019)
This is a blog about our development of Unexplored 2: The Wayfarer's Legacy. This game features state-of-the-art content generation, generative storytelling, emergent gameplay, adaptive music, and a vibrant art style.
The content generator of Unexplored 2 generates tile maps. Typical output looks like this (you can read more about our level generator here):
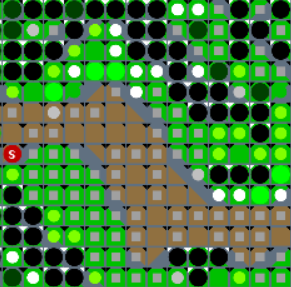
These tile maps are stacked, using different tiles to indicate tiles ground types (grass or dirt in this example) and various decorations. In this case there are some bushes (large green circles), Rocks (black circles), plants (small green circles), flowers (white circles), and decorative textures (grey squares). There also are special tiles that indicate gameplay data such as the spawning point marked with an 's'. In addition, tiles can be tagged with additional information such elevation or special subtypes.
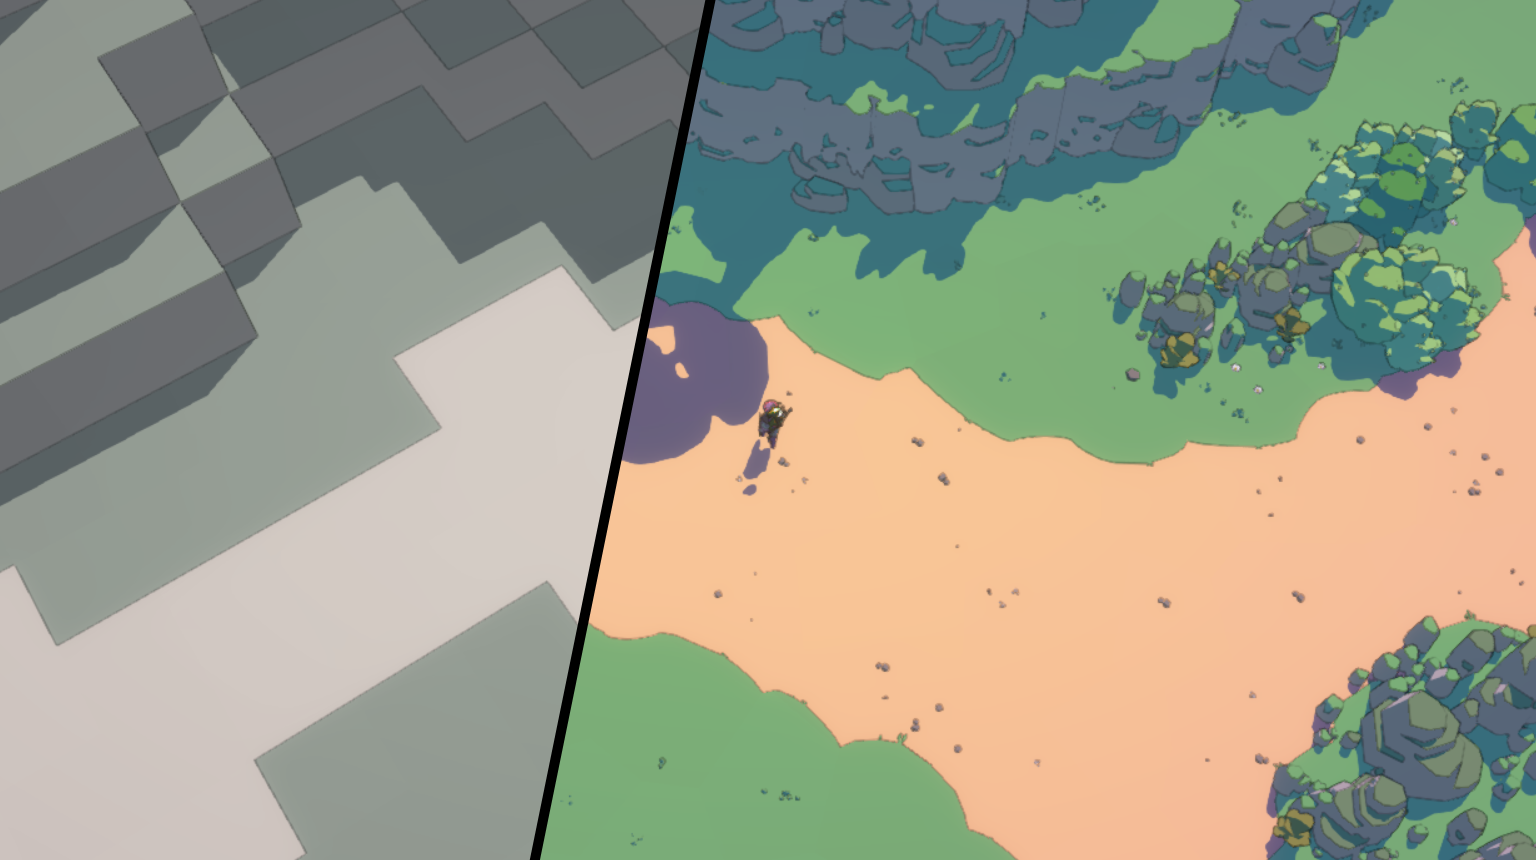
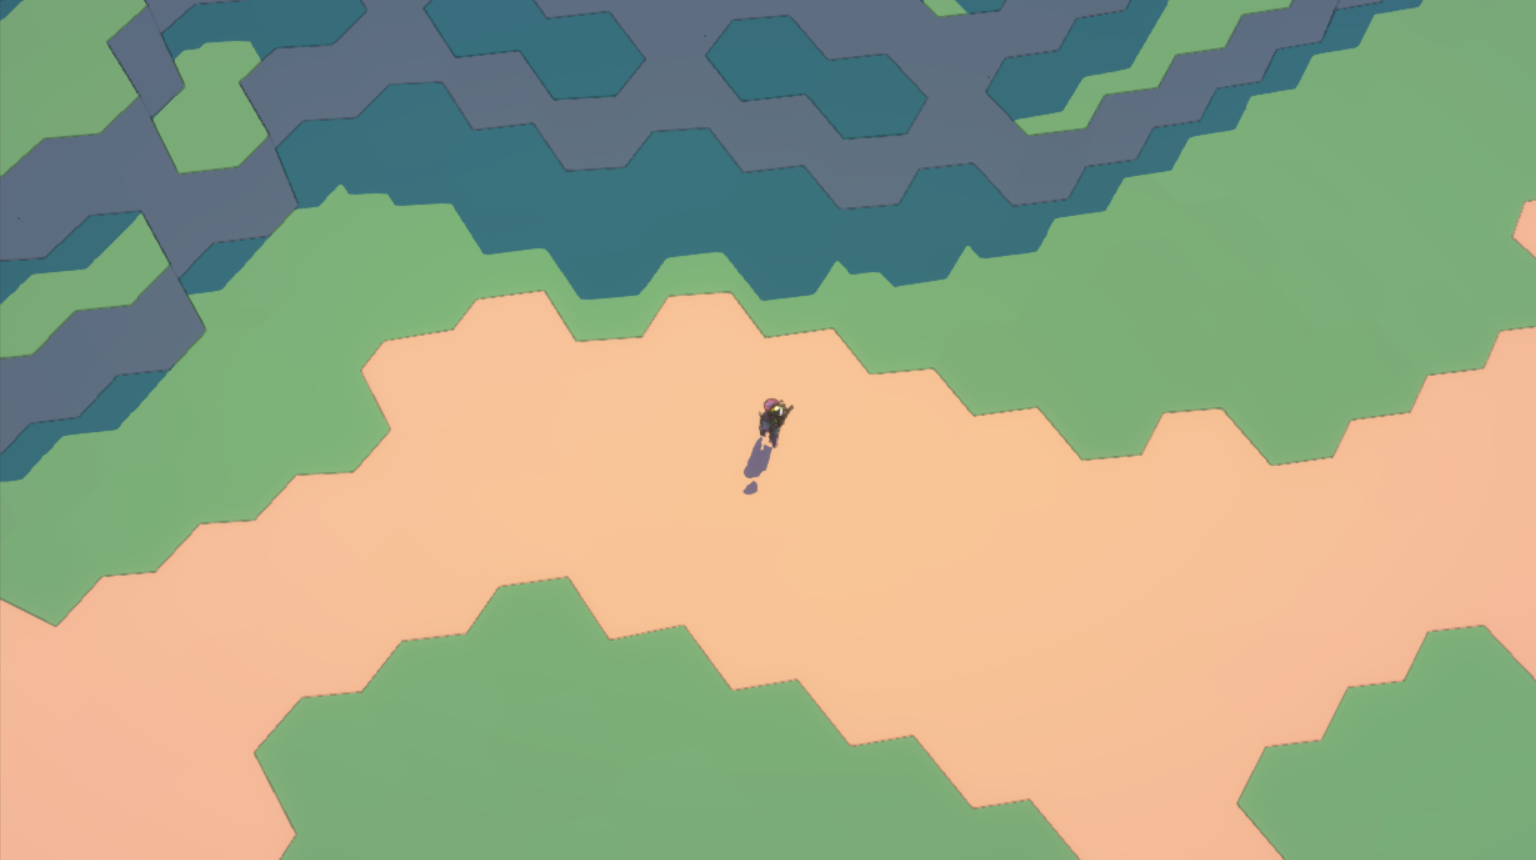
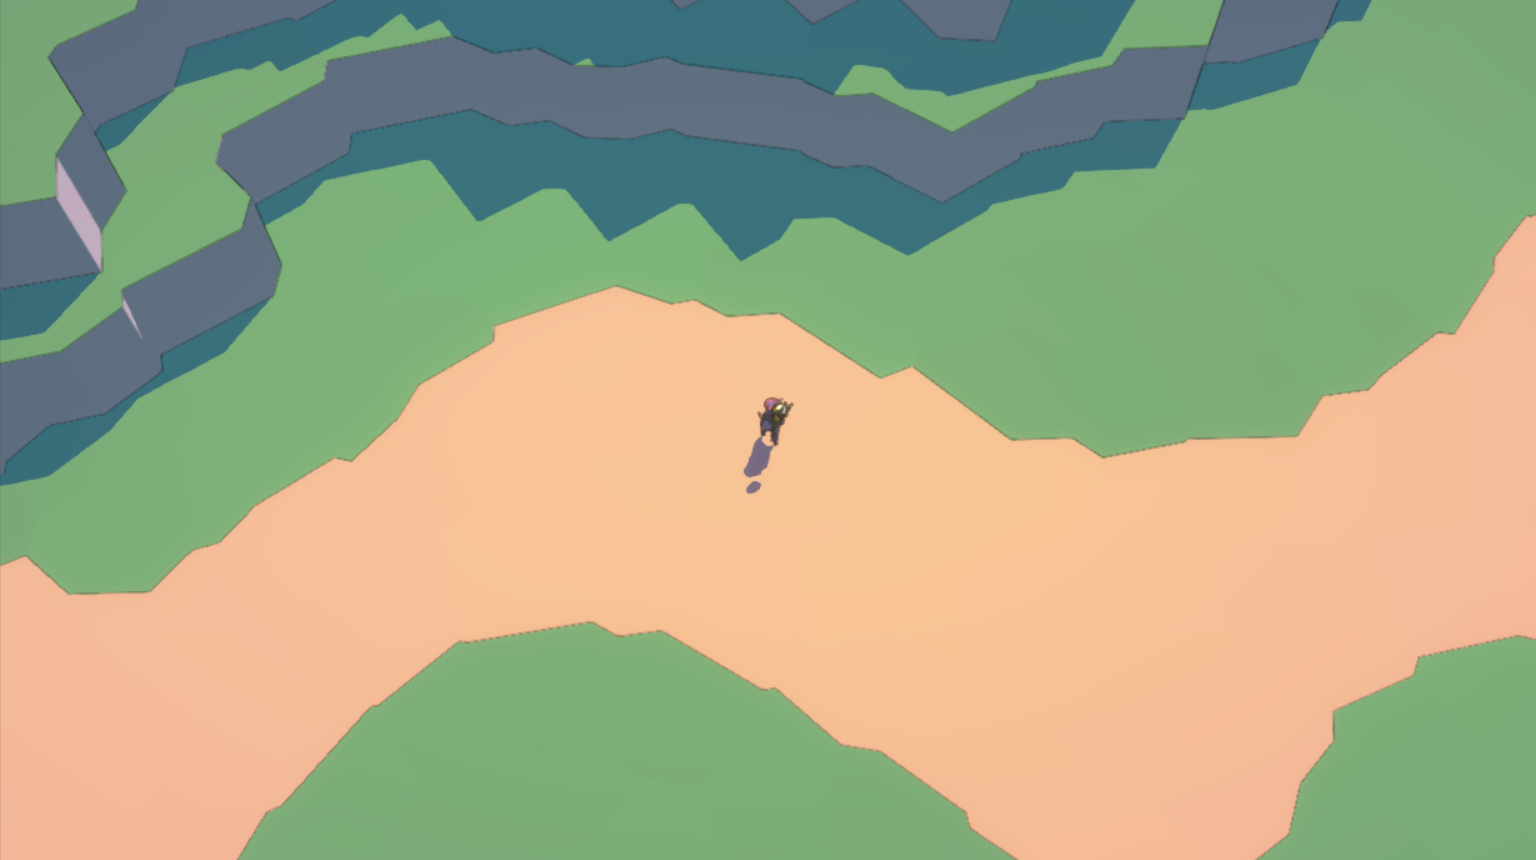
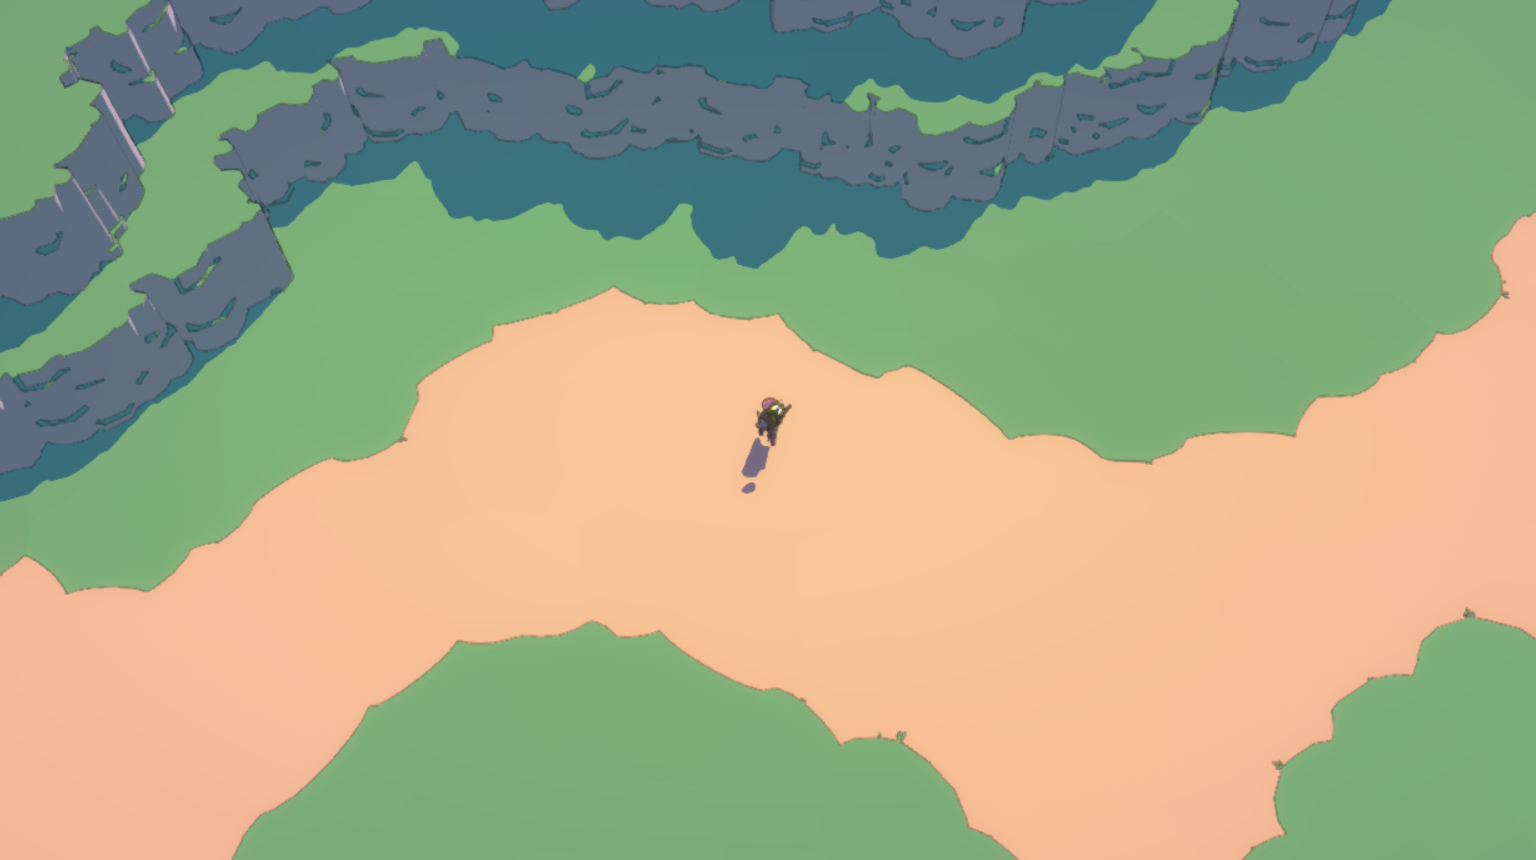
Tile maps are a convenient data structure for generators to work with. But they also are quite rigid, and often the grid has a tendency to be visible in game. Yet, in our case when the data is loaded into the game and assets are placed the result looks like this:
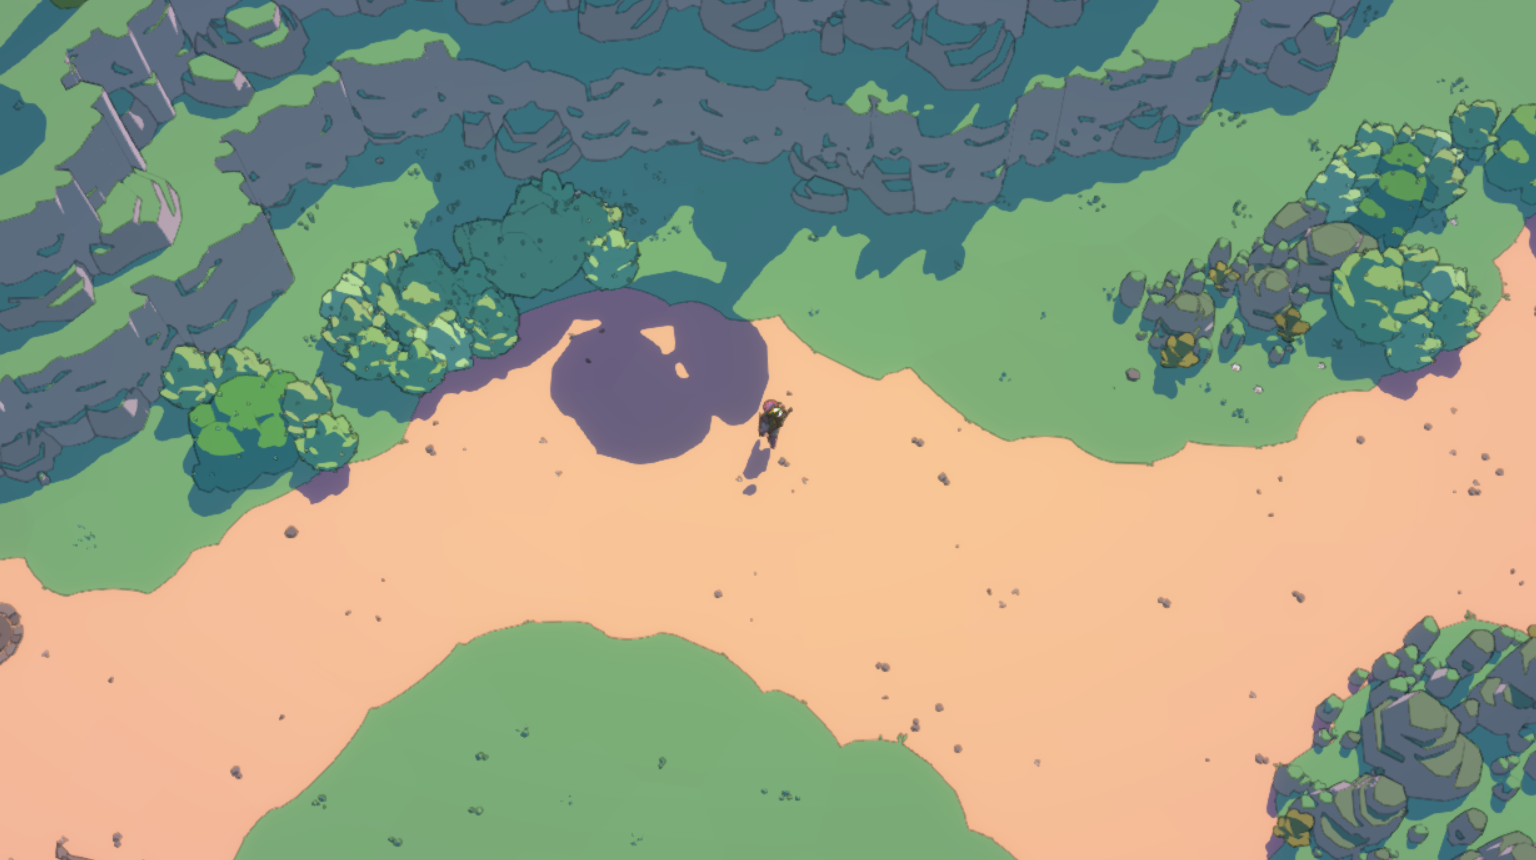
I like to think we did a pretty good job at hiding the tiles, and here's how we did it.
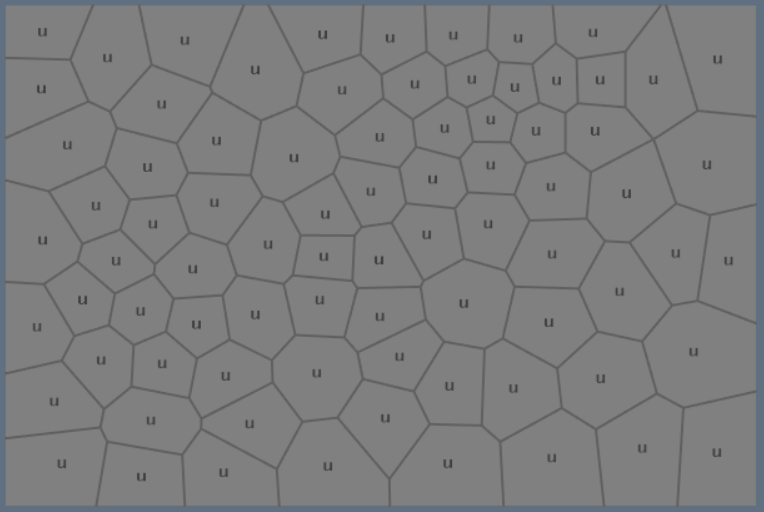
The trick is that individual tiles are matched to the cells in a voronoi diagram. Which can be used to generate shapes that are much more natural looking. A voronoi diagram is created from seeding a plane with random points and partitioning off cells so that each point in the plane belongs to the cell that corresponds to the closest seed point. There are quite a few interesting applications of voronoi diagrams for PCG.
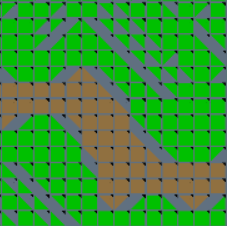
A typical voronoi diagram created from a random but fairly even distribution of seed points looks something like this:
For Unexplored 2 we use different type of distribution of seed points. To start with, we seed one point for each tile. That way we are certain every tile in the tile map can be mapped to one cell in the voronoi diagram.
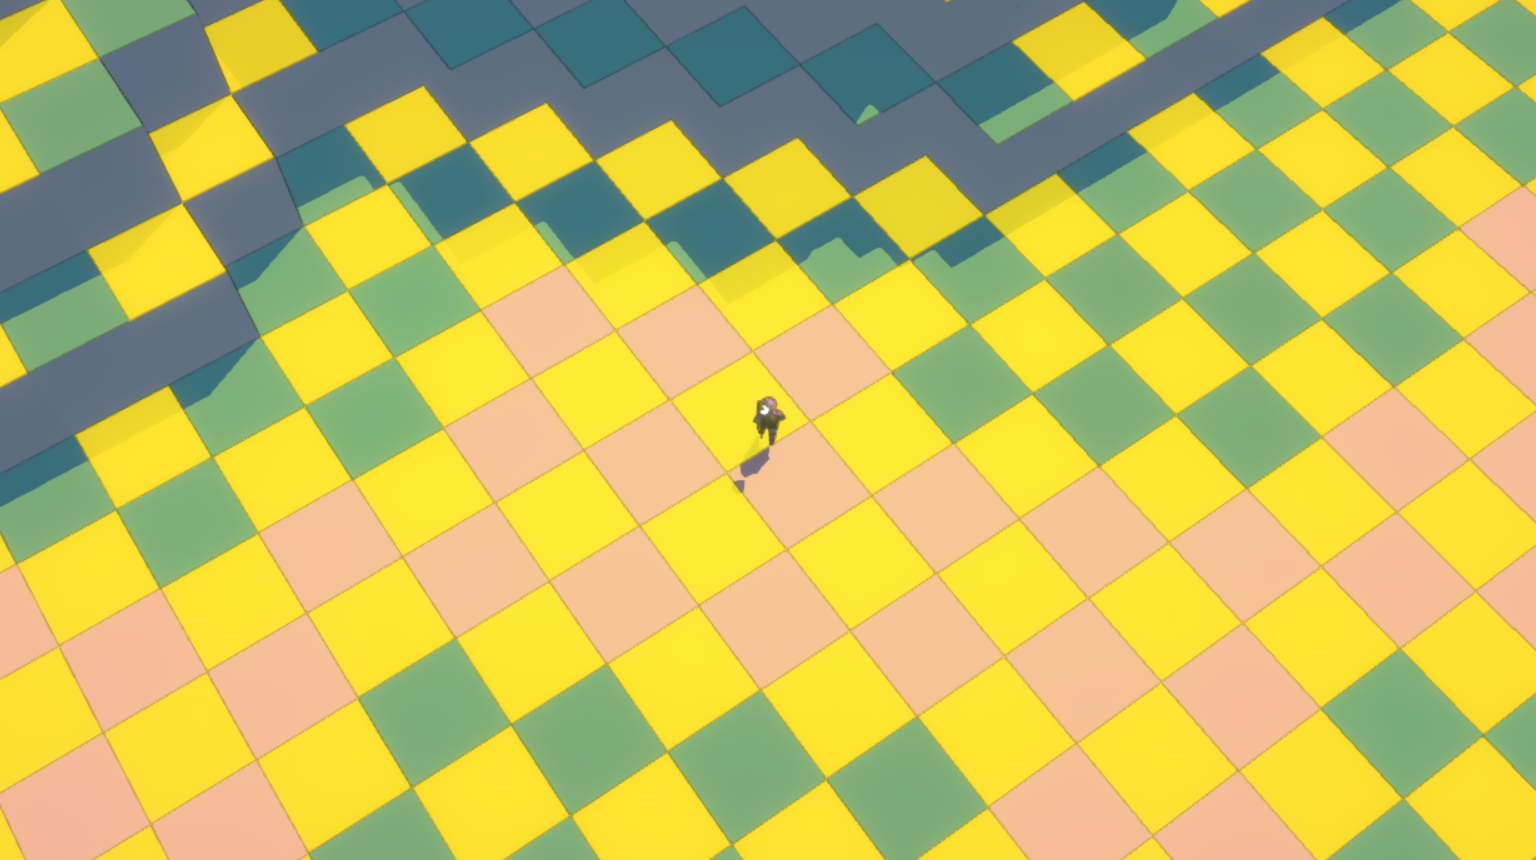
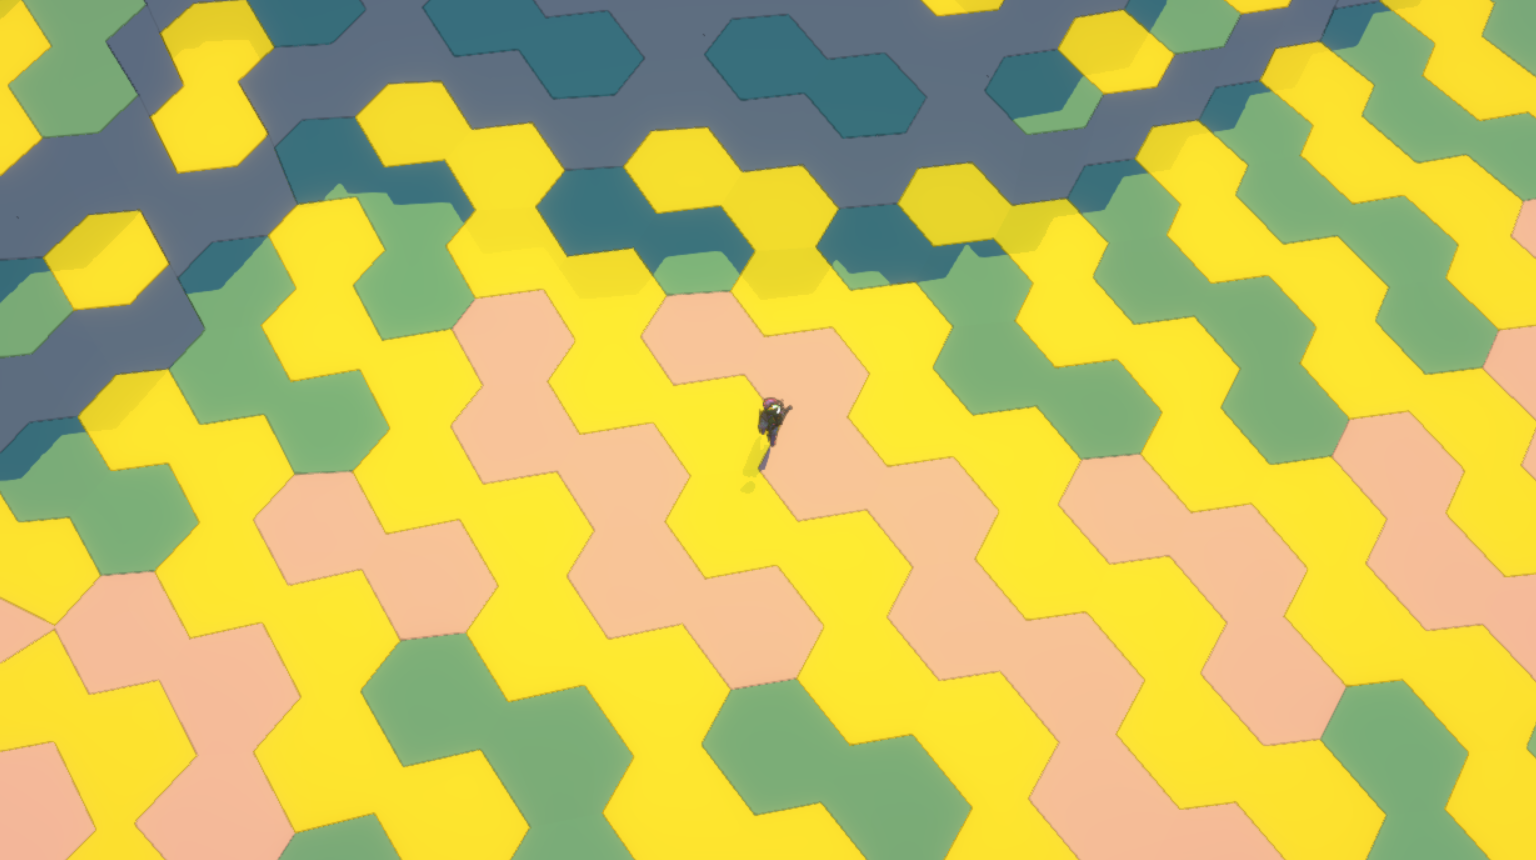
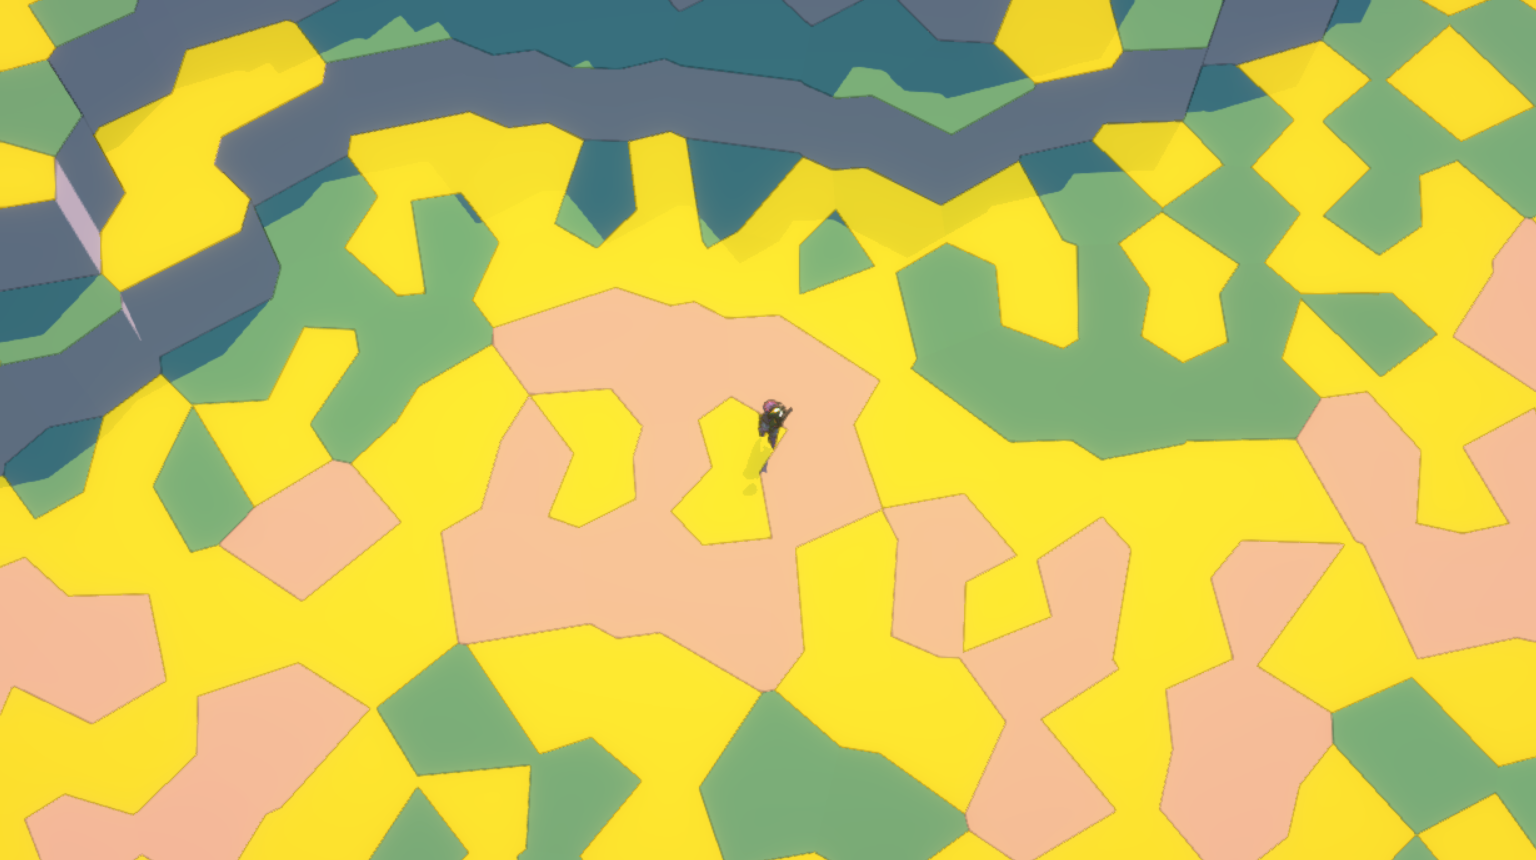
Now, if you place the seed points in the middle of each cell you end up with straight grid that looks exactly like a tile map (for this image and the others below I also made a checkered version where half of the tiles are rendered yellow so you can see the patterns a little bit better):
A simple way of making this look better is to simply randomize the position of each seed point. When shifting the points it helps to make sure the point does not move outside its original tile.
The result looks something like this:
Better, but very noisy, and you don't get nice flowing lines in this way. It can be improved by 'relaxing' the voronoi diagram (a standard technique associated with voronoi diagrams I won't go into here). But it will always stay a little noisy, and it is difficult to effectively suggest shapes on a scale that surpasses the scale of the individual tiles.
To get around this you need to do is to move the points around smarter than simply using random displacement. Different types of movement have very different effects. For example, using perlin noise can create interesting curved tilemaps. Or you can turn the whole thing into hexagonal shaped tiles simply by moving every other row of seed points to the left:
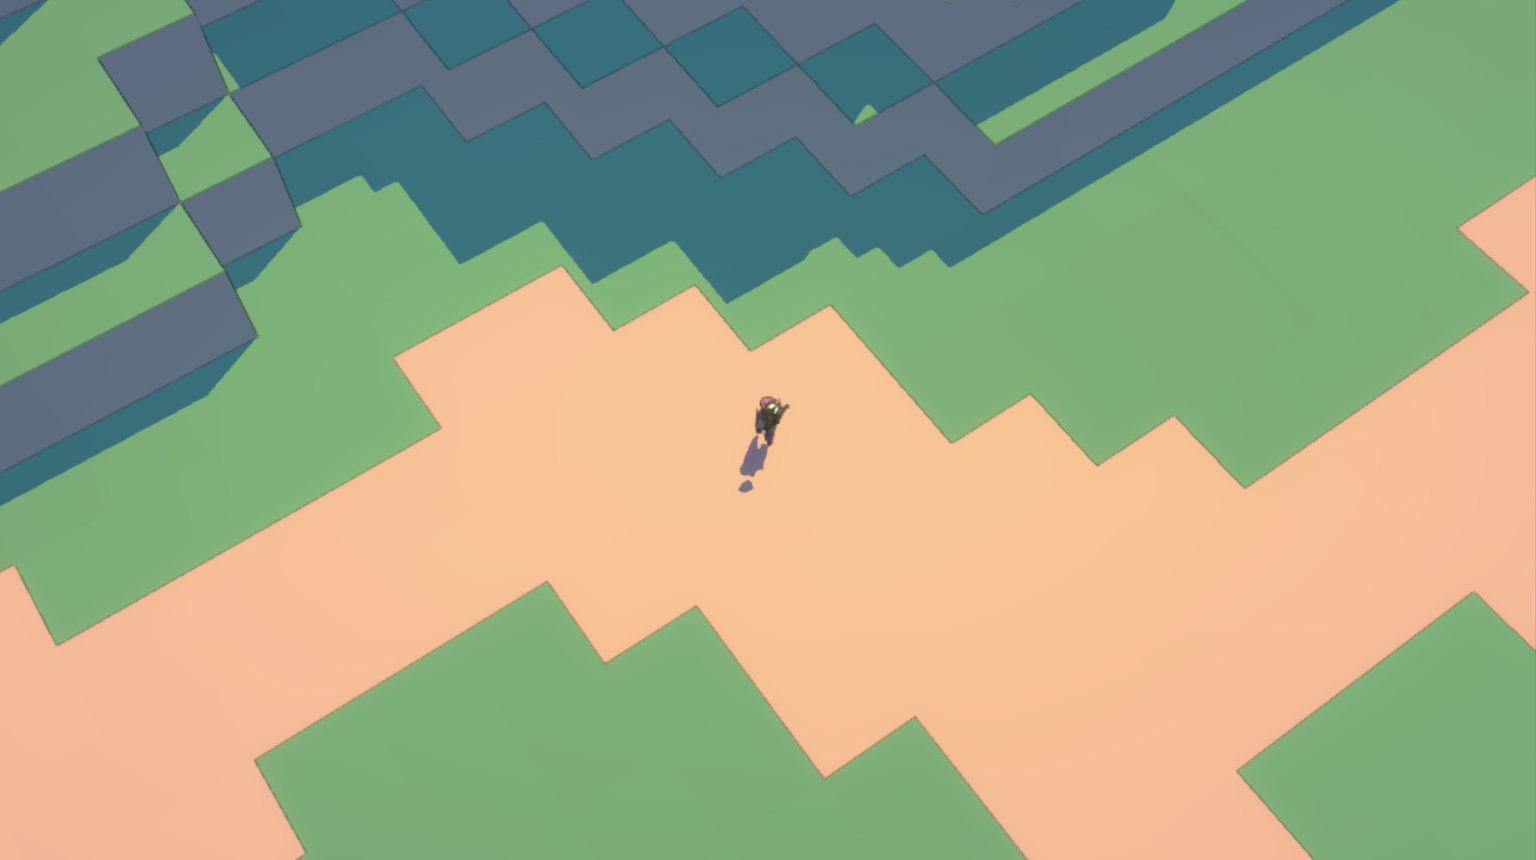
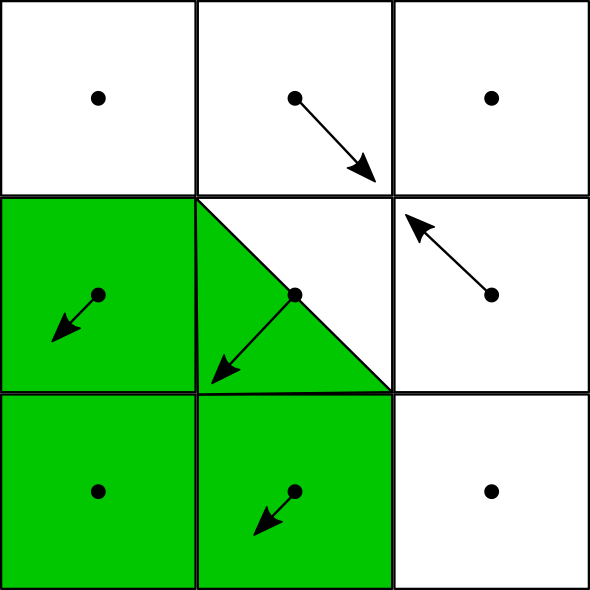
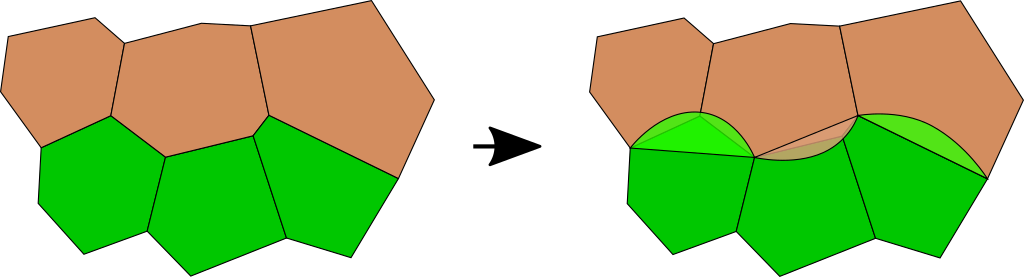
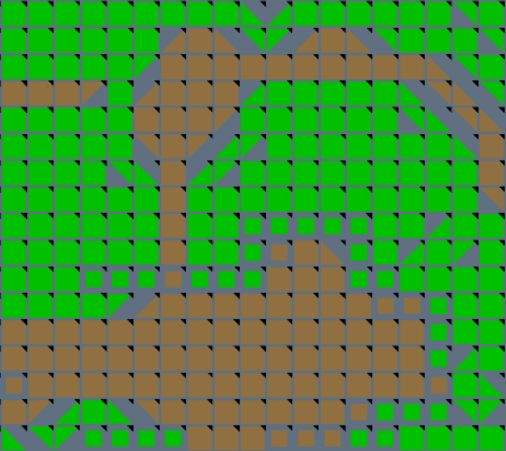
The real breakthrough comes when we start moving around the seed points in particular patterns to create rounded corners. The first step of this process is already taken inside the level generator. Corners are detected between ground types and the corner tiles are marked with different shapes, indicating how they should be deformed to generate a better looking environment:
In this case elevation differences also cause corners to appear in the tilemap. That's the reason you see the extra rounded corners in the grass in the top right and bottom left where slopes were generated.
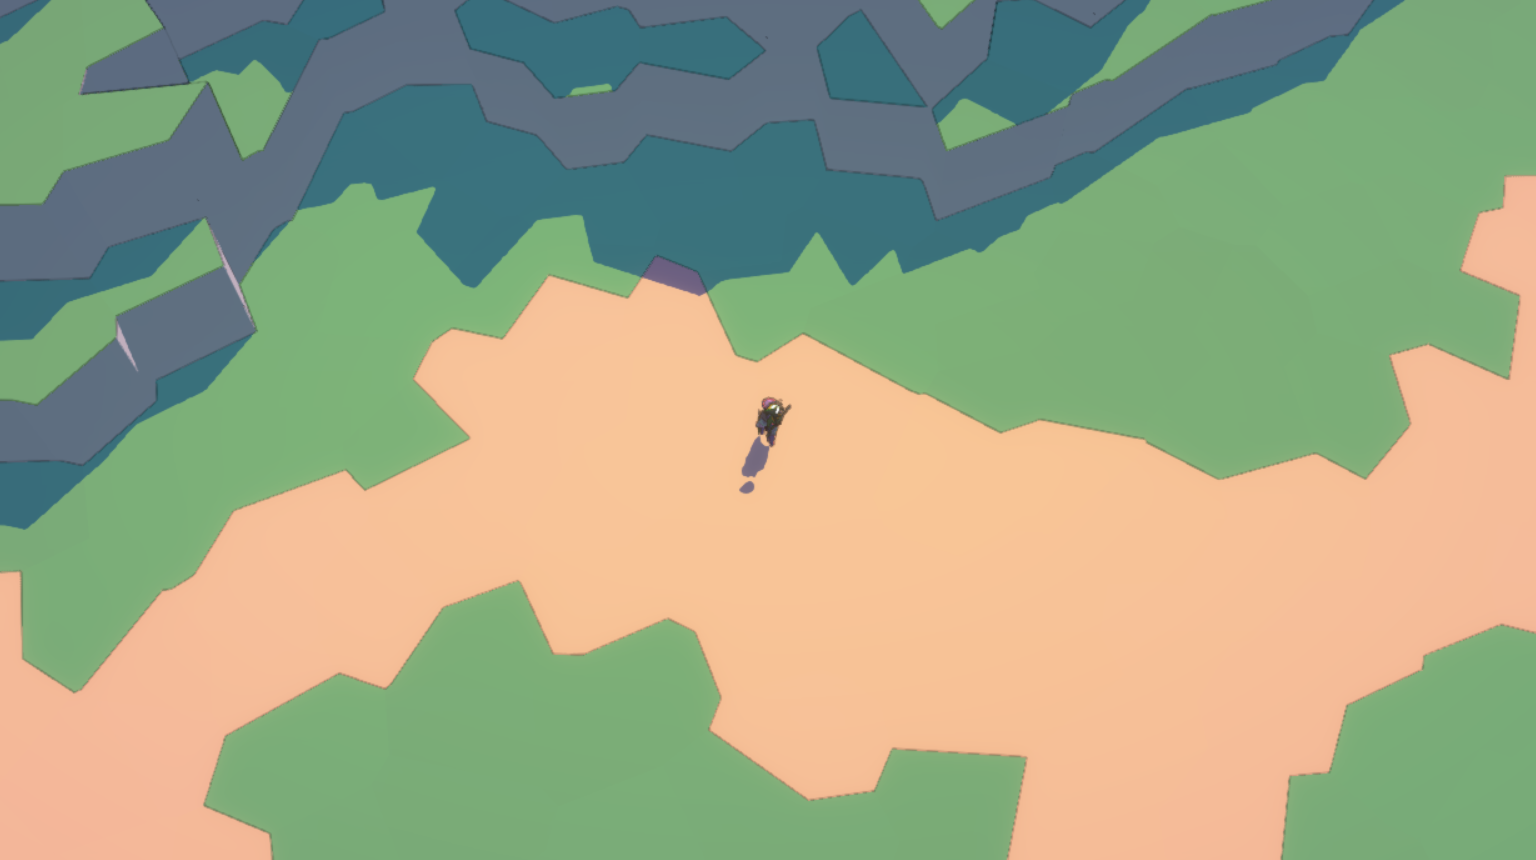
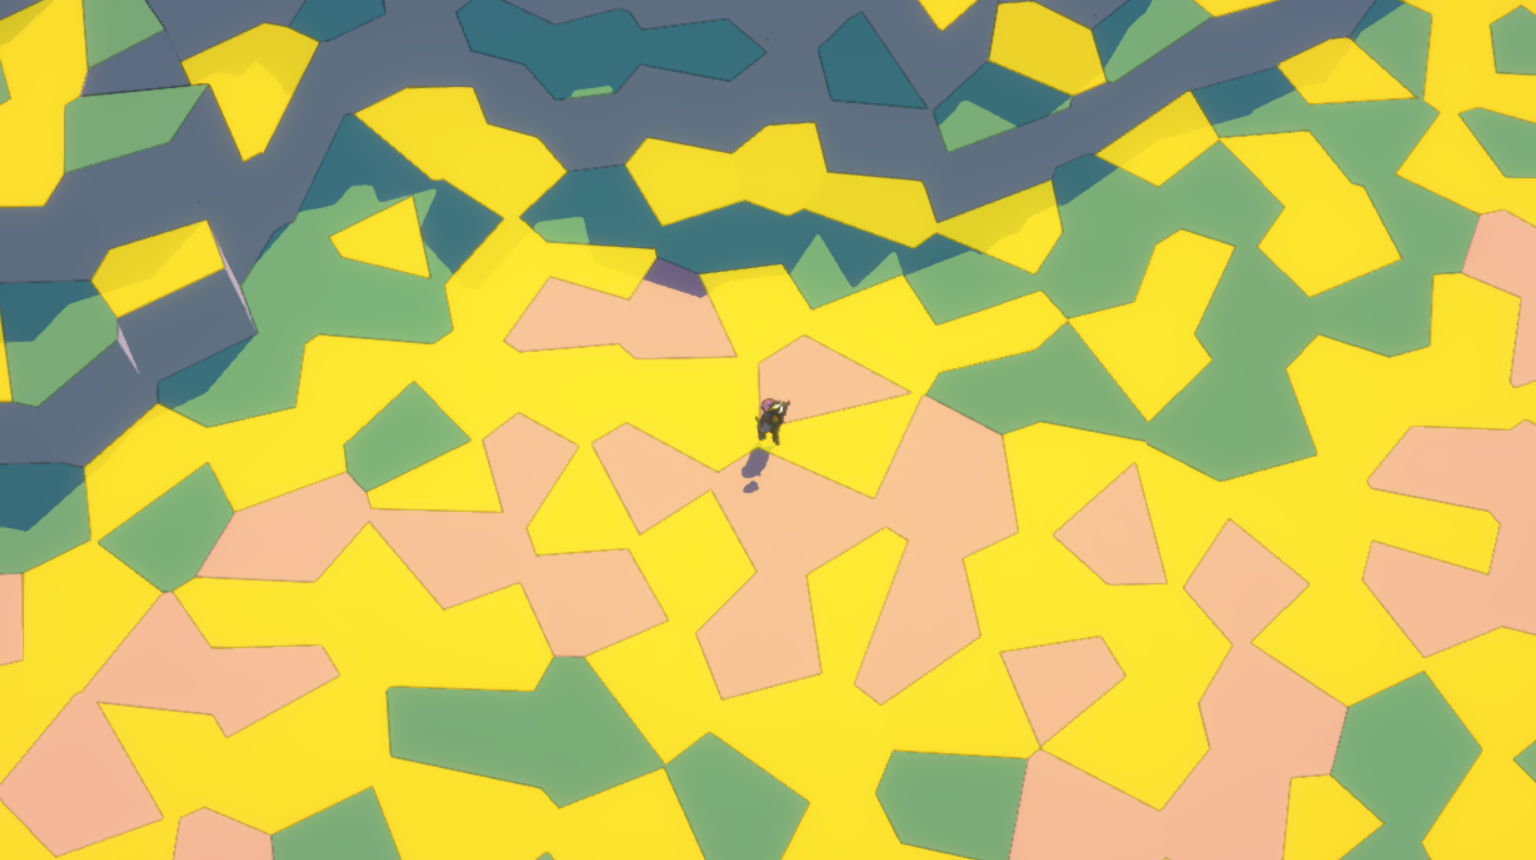
The game uses this information to displace the seed points of the voronoi graph. Each rounded corner shifts the location of the seed point (see image below). In addition it also shifts the seed points of its four orthogonal neighbors. This process is cumulative; seed points can be shifted multiple times if they are near several corners. However, after all displacement are processed, the seed points are randomized a little (about 10% of the width of a tile in either direction), and the final displacement is restricted to a maximum of 40% of the width of a tile.
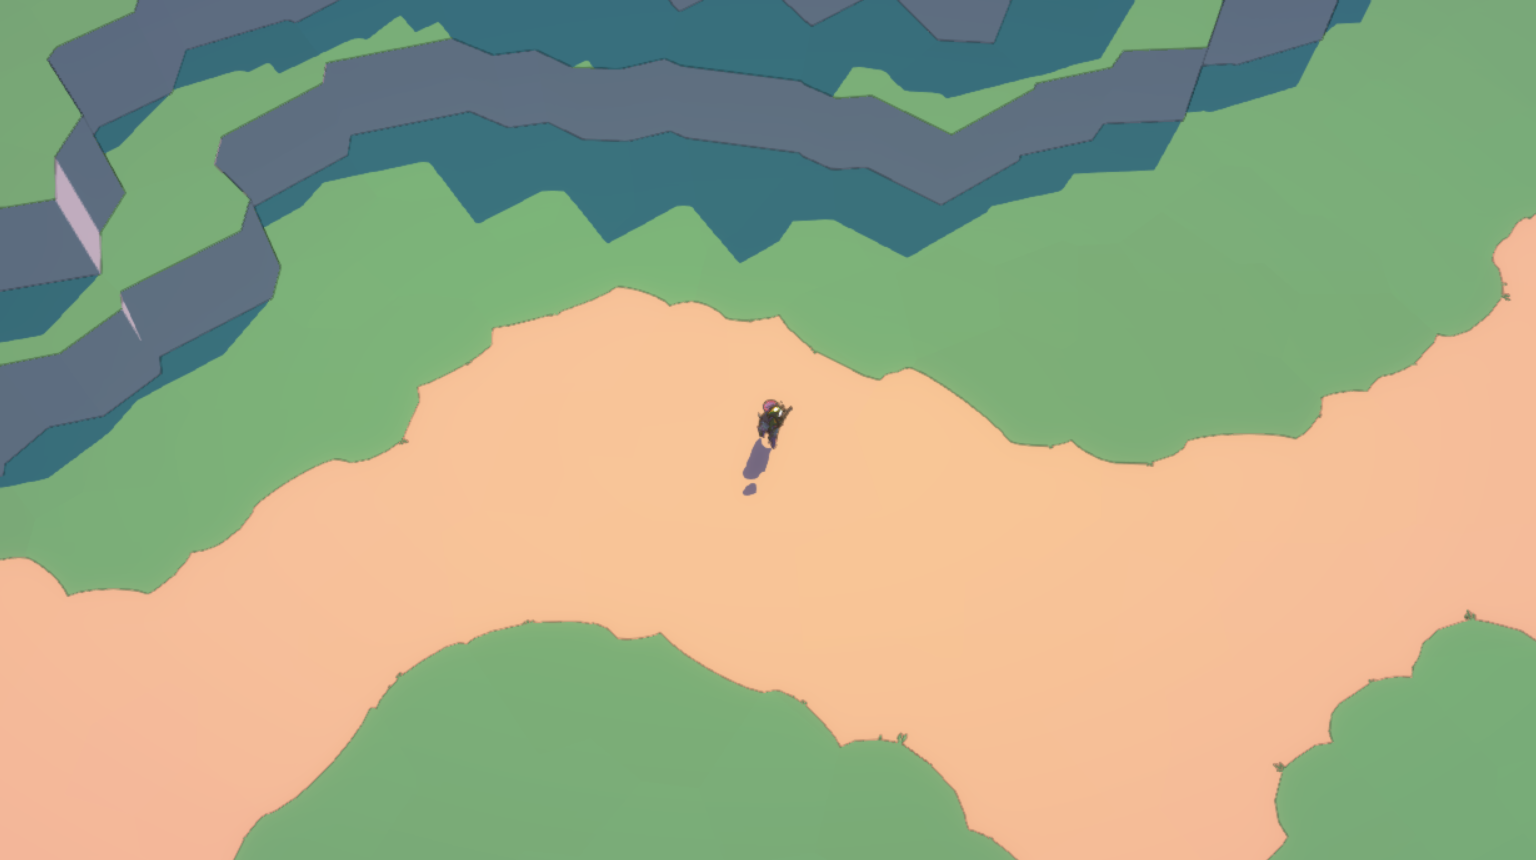
The result is already pretty astonishing:
But we're not there yet...
The overall shape is better, but the edges are still very straight and somewhat ragged in appearance. The way we cover that up is by using curved assets placed along the edges where the colors are different. The real trick however is that one curve is often placed over two edges, using their relative angles to determine the direction of the curve.
The result looks like this:
Next, we use 3D assets to give extra texture to the cliffs:
And finally we add the other assets to fill out the level. The placement of these assets is dictated by the level data generated earlier, and in general follows a simple philosophy. We use smaller assets to surround larger ones creating natural and nice transitions. Of particular note is the rocks added to the bottom of cliffs to create more variety and to visually dampen the vertical slopes dictated by the gameplay:
The corners are not the only type displacement we uses. For example, near artificial structures (such as the ruined walls below) you want the edges to be straighter:
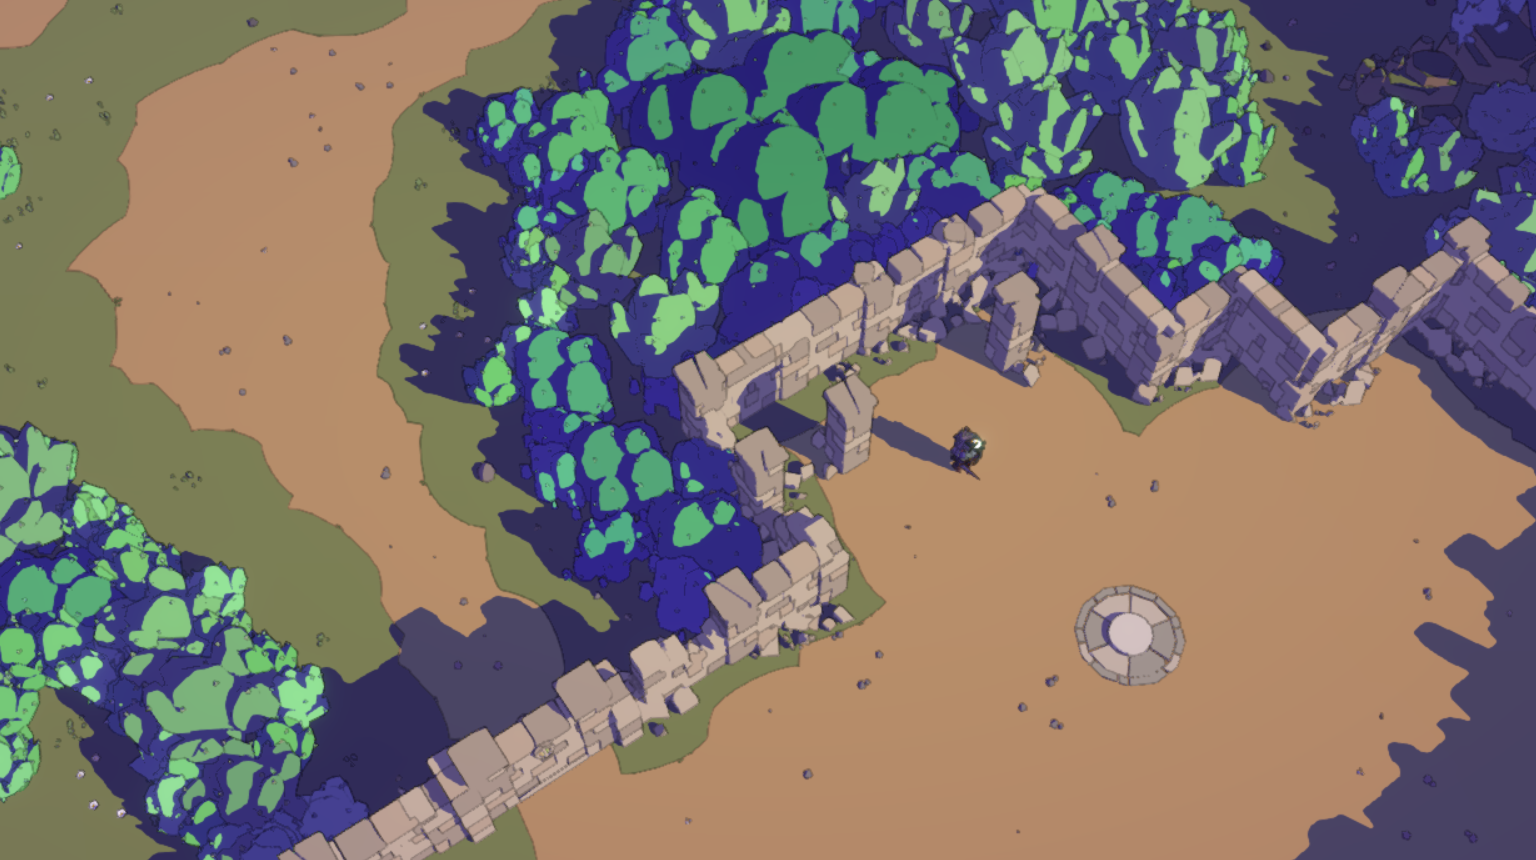
In our system this effect is easy to achieve. We simply introduce a different displacement rule that makes sure that tiles featuring artificial structures are not displaced. The generator uses smaller squares to mark these tiles and the game simply makes sure that all displacements are ignored:

If you look at the ground you can clearly see how specific areas can be made straight while others curve more naturally:

Isn't that neat?
There are a few other rules you can use easily mix in with this technique. For example, we occasionally force the tiles into a hexagonal pattern to make sure narrow paths are wide enough to be traversed. And I am sure we will find other uses for other patterns as well.
This is one of the many reasons I really love voronoi diagrams. Another time I will write about how we use them to generate and decorate Unexplored 2 world maps.
If you are interested in learning more about the game please check us out on Epic Game Store.
Contact: info@ludomotion.com